Being the crazy cat lady that I am, I've been searching for a decent looking cat tower for quite some time now. Finally, I found Whisker Studio. They have a customizable "Elevation Modular Cat Tower". What I like most about this tower is that it doesn't take up too much space, including the base. The kidney shaped shelves make it look more like a decorative sculpture than a cat tower, and the usage of IKEA parts make it really accessible as a DIY. Taking it one step further, I decided to wrap the pole with rope so that it doubles as a scratcher too. Hopefully now they will leave our new chair alone!
Showing posts with label DIY. Show all posts
Sunday, November 18, 2012
Saturday, July 14, 2012
Friday the 13th
Yesterday I had a half day from work so I went over to my old hood, Bushwick, to do some cheap vintage shopping. Specifically I was on the look out for a denim jacket I can turn into a denim vest. For those of you who don't know Urban Jungle, it's exactly like its name. There was a moment, when rummaging through the racks with no a/c, I thought - why am I here?!?
However my persistence paid off in the end. I found 3 gems and spent only $18! I'll show you what I do with the jacket tomorrow...
Tuesday, July 10, 2012
Liberty print mini dress
This dress was supposed to be a romper - but I couldn't get the shorts part of it right, so I just made it into a mini dress. It's really mini so I have to wear shorts under it. But then... just today I got the idea to wear it with a short sheer skirt - since the skirt needs something under it anyhow. I love versatility especially when it comes unexpected!
I suppose it would be a good day to night look, if you're into that kind of thing. For some reason I {personally} don't separate what I wear from day to night. Doesn't that sound strange for someone who makes a living out of designing clothes? Usually when I change clothes after work to go out, it's because I want to get comfortable or the clothes I wore that day feel stale. Does "night" really mean "comfortable"?
Monday, May 21, 2012
Count er maroon
Is it me or does life keep getting busier and busier? PHEW! Here's a post I've been meaning to put up here but then we went on a trip... and then came home to no electricity... and other building things... and life... you know how it goes.
The big news around the apartment is... Mr. Z changed out our kitchen counter! Whoo! It was not an easy feat, but already the counters don't seem so new after living with them for about a month. Not liking a color may seem like a small issue - especially since the material was a nice (and expensive) granite - but I can't think of a color I dislike more than maroon - eek! There were minor mishaps removing the heavy maroon counter, but he did it ~ and it made a HUGE difference. Isn't he amazing :D? We ended up giving the old one away for free on Craigslist and the guy messaged me a photo of what he did with the old counter, which is kinda cool, right?
Planning...
Doing...


And this is what happened to the maroon ones! I'm glad they got a nice new home!
Labels:
apartment,
architecture,
brooklyn,
color,
DIY,
home,
interiors,
refurbishing
Saturday, March 24, 2012
Friday, November 11, 2011
Pillow talk
During my unemployed days, I made pillows and sold them on Etsy. So when we finally received our sectional a few weeks ago, I felt like I needed to apply that handmade touch to our living room. I'm not sure why I started searching for grain sacks, but that's where I started. I love the rustic appearance of vintage grain sacks. I found a nice selection here. They are usually made out of sturdy canvas and the logos printed on them are so unique! I wonder if the new bags are made the same way? I made 2 for the couch but ended up placing one in the bedroom, because it didn't look quite right with the other pillows.
Labels:
apartment,
DIY,
interiors,
repurposing,
vintage
Sunday, October 23, 2011
the Apartment Vol. 2
This weekend I learned a very embarrassing lesson. Somethings should not be "Done Yourself". There are somethings that should be left alone... for instance ugly jumbled up cable wires outside of your building. Are they connected or are they not connected? In attempts to clean up the entrance side of our building, Mr. Z and I were over zealous and ended up cutting one of our neighbors' internet/phone/cable tv... Yikes! Luckily, our neighbors were very cool and calm about the situation, but we still felt terrible. We all know what a pain it is to call the cable company, set up an appointment, and wait for the guy to show up between a time frame of 5 or so hours... that is if you get an appointment within 2 weeks of your call. Hopefully that will not be the case. To help lessen the blow, I got them a bottle of wine. Oh man... I'm still cringing from it.
So, on to more things that are safely done yourself...
I love the way chalkboard looks so why not make a whole wall a chalkboard? It makes it really convenient to write your to-do's and warms up the space a bit. The only thing is that the stuff stinks so you have to have a lot of fans and ventilation while you are painting. I wanted the wall to be magnetic as well, so I applied a magnetic primer. However, I found that the magnetic primer makes the wall a little too course for a writing surface. So if I were to do it again, I would only use the chalkboard paint.
So, on to more things that are safely done yourself...
I love the way chalkboard looks so why not make a whole wall a chalkboard? It makes it really convenient to write your to-do's and warms up the space a bit. The only thing is that the stuff stinks so you have to have a lot of fans and ventilation while you are painting. I wanted the wall to be magnetic as well, so I applied a magnetic primer. However, I found that the magnetic primer makes the wall a little too course for a writing surface. So if I were to do it again, I would only use the chalkboard paint.
A little trauma happened while we were painting... Loki one of our cats got into the chalkboard paint and his paw was black for weeks... so if you have animals, you probably want to shut them out of the room you are painting. This stuff has a tar-like consistency.
Friday, October 14, 2011
the Apartment Vol.1
There were pretty sizable gaps between the floor and the foot of the molding, so we tore them out and replaced them with new ones.
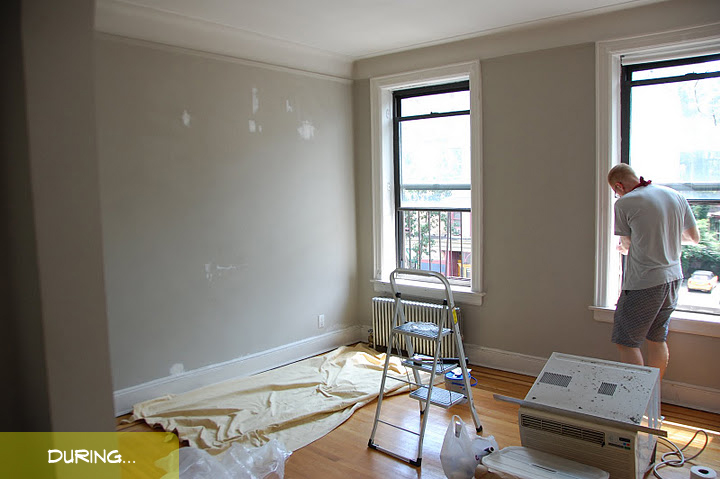
I love the amount of light we get and the details of an older building. I usually go for grey or white walls, so this time I went for aqua, but chose a grey color as well to balance. I say "I" but Mr. Z of course had a lot to say about the colors as well ;-P. I think the painting was the hardest part. It was never ending because we repainted all of the molding too!
Happy Friday! I'll post more of our apartment and DIY renovations soon... once I think it's presentable.
Tuesday, October 11, 2011
More about my Windowfarm
It took some work at first, but now I have the beginnings of a hydroponic garden! I've been eye-ing the Windowfarms™ project for some time now, and was lucky enough to attend their moving sale/potluck/learning session. The project is pretty amazing, and I can't wait to see what they come up with, in the next stage of their window farm design. Made from found and recycled water bottles, tubes, and an aquarium pump (and more but you get the point) the current home kit runs about $274 ($139 without the bottles). Perhaps the first generation of the farms are very well thought out prototypes? It sounds like Britta Riley, the founder of Windowfarms™ is taking her project to the next level with "fancy" Windowfarms™. Meanwhile, I'm very happy and content with my farm... luckily my cats are leaving the thing alone.
I started out with these parts...
and then sprouted the seedlings in grow pods...
...and once the seedlings were a few inches tall, I transferred them into the bottles. Easy right? Go here for more detailed instructions.
Labels:
DIY,
food,
garden,
home,
product design
Tuesday, October 4, 2011
Smells like teen spirit... I mean lavender
Those who know me know that I am overly sensitive to smells. It's sometimes hard to have this "neurosis" and live in NYC, especially in the summer time. To keep things even more smelly, I work in Midtown West where many men use phone booths and scaffolding as public urinals. Oh New York... even though you smell, I still love you. Now that's love right there, folks.
Needless to say, I like my home to smell nice - though "nice" is relative. I thought a bunch of reed diffusers would be pleasant to have around. Preferring natural scents, I couldn't find any pre-made diffusers that I really liked. Many of them were too heavy and had several scents, oils, flowers, herbs - all in one bottle - enough to make my nose ache. Wanting a simple clean scent I decided to make my own.
When I did some research, I found that I can get the exact simple scent I want for a very low cost {bonus!}. I also found that I can partake on another one of my obsessions - lavender -! I know some people dislike lavender and think it smells medicinal, but to me *true* lavender has a subtle clean aroma that just makes me relax and happy.
Sooo... if you want to make your own diffuser with your favorite essential oil, just gather these ingredients and follow these simple steps.
*Remember these bottles I collected from the Dead Horse Bay? Well, I finally put them to use! You'll need medium to small bottles that have small top openings. This is so your essential oil doesn't just dissipate into the air, and instead gets soaked up into your reed sticks.
You will need:
1. Glass bottles
2. Reed sticks
3. Dipropylene Glycol
4. Your favorite essential oil
5. Funnel
6. Paper towels
Pour in about 70-80% Diproplyene Glycol and about 30-20% essential oil into your glass bottle(s). Stir the mixture up a bit with a reed stick, and put some more sticks in the bottle - you know, enough to have a nice "bouquet" of sticks - and voilá! Isn't that easy? Enjoy~!
Needless to say, I like my home to smell nice - though "nice" is relative. I thought a bunch of reed diffusers would be pleasant to have around. Preferring natural scents, I couldn't find any pre-made diffusers that I really liked. Many of them were too heavy and had several scents, oils, flowers, herbs - all in one bottle - enough to make my nose ache. Wanting a simple clean scent I decided to make my own.
When I did some research, I found that I can get the exact simple scent I want for a very low cost {bonus!}. I also found that I can partake on another one of my obsessions - lavender -! I know some people dislike lavender and think it smells medicinal, but to me *true* lavender has a subtle clean aroma that just makes me relax and happy.
Sooo... if you want to make your own diffuser with your favorite essential oil, just gather these ingredients and follow these simple steps.
*Remember these bottles I collected from the Dead Horse Bay? Well, I finally put them to use! You'll need medium to small bottles that have small top openings. This is so your essential oil doesn't just dissipate into the air, and instead gets soaked up into your reed sticks.
You will need:
1. Glass bottles
2. Reed sticks
3. Dipropylene Glycol
4. Your favorite essential oil
5. Funnel
6. Paper towels
Pour in about 70-80% Diproplyene Glycol and about 30-20% essential oil into your glass bottle(s). Stir the mixture up a bit with a reed stick, and put some more sticks in the bottle - you know, enough to have a nice "bouquet" of sticks - and voilá! Isn't that easy? Enjoy~!
P.S. Thanks for your comments! I very much appreciate it :)
You inspire me to post more...
Saturday, May 7, 2011
Got an idea?
Today I'm headed to the Festival of Ideas. It started a few days ago, and the list of exhibitors, seminars, and vendors is pretty intense. The freakish organizer in me wanted to make a check next to each item I am interested in... but I realized very quickly that I should just pick a day and throw myself in it. I will definitely post the ideas that get me (the most) excited. Would love to see your thoughts and ideas in the comments! Comment here on my blog page.
If you are in NYC, hope to run into you! Happy Saturday!
Labels:
architecture,
art,
DIY,
garden,
graphic design,
new york,
product design
Tuesday, April 12, 2011
DIY Striped Tank
Alright, finally snapping out of this lackadaisical funk. Spring project time.. I'm sick of all my clothes, aren't you? Why not paint them?
Here's how on my Burda Style page.
Thursday, January 27, 2011
Facelift Project Details
Some of you have been asking about the technique I used to make this coat. I’ve posted the steps I took to attach the knit pieces to the coat here, but by no means is this a professional or right way! Anyhow, here are some details shots of the inside that may help more than my instructions... Click on each image to view them larger.
Subscribe to:
Posts (Atom)